You worked on the site on localhost on your computer because it was easier for you, but then you realized that everything should be transferred to hosting and that's where the problem arose. You thought it was basically a copy paste solution, but the problem is much bigger.
Especially for beginners, this can seem like too much of a procedure and complication, but all in all, it's very simple with a few clicks.
First of all, it is necessary to list what is not there (we will think that this is a WordPress site).
So we have a site, that is, the files that make up the site itself, which are wp-conent, wp-admin, wp-include and the like.
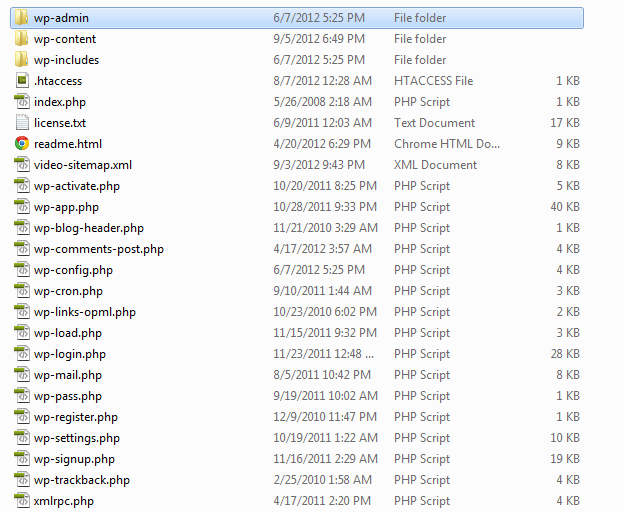
Then we also have the database that you created in phpmyadmin.
To begin with, should we locate the files first?
If you use xampp, then your site, ie the files from your site are located in: C:/xampp/htdocs
If you use wamp, then your site, ie the files from your site are located in c:\wamp\www
Well, since we have all the files there, select all the files, right-click and zip. (using 7zip or winrar)
Now you got that file zipped it's best to transfer copy paste to desktop it will be easier. Let's say we named that zip file mysite.zip
Export database
Now it's the turn of the bases. Where is the base?
Open phpmyadmin usually it's on the link http://localhost/phpmyadmin
When you open it on the left side you have some bases and your base that you created in our case is TEST
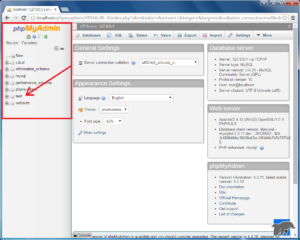
You click on your base and then in the upper right corner on Export as in the picture:
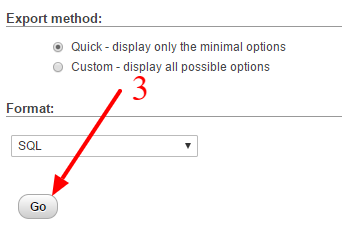
That's all about database export or backup. Because in this way the backup of the database was done so that in case something bad happens, you can restore the database and everything will be ok.
Now we have the file test.sql which we probably saved on the desktop. But in order to make that file smaller, we need to zip it.
Right click on that file and we find the option "Add to archive..." this option exists for both winrar and 7zip. With winrar it is immediately on the right and for 7zip it is like a sub-option.
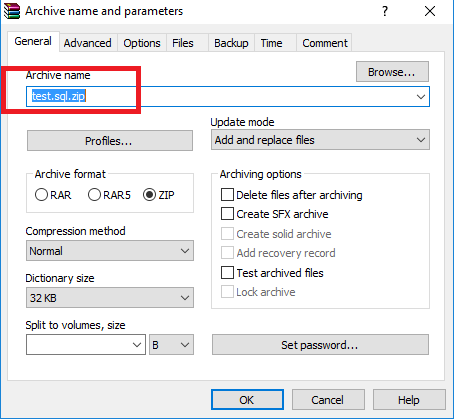
It will immediately offer you to make it test.zip, but you change it to be test.sql.zip as in the example above. That's the only way it will work otherwise it will report a broken file.
After we've zipped the database properly and after we've zipped the files properly, it remains for us to transfer it all to the hosting account.
Transferring site files to hosting
Transferring files via FTP server to hosting:
First of all, download the FTP program (recommended WinSCP)
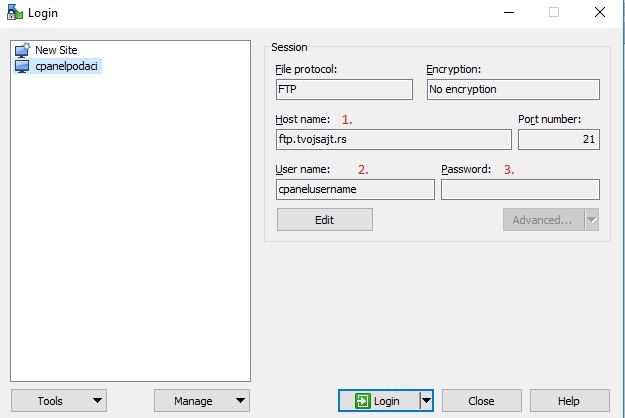
set as you see in the picture:
FTP, No encryption, Host name should be ftp.sajt.rs (replace sajt.rs with your domain), port is not touched, Username and Password should be the data you received by email when your hosting account was activated and you clicked login.
The next step is to upload all the files or files to our hosting account in the public_html folder (and if it is an Addon Domain, then in the folder of that domain).
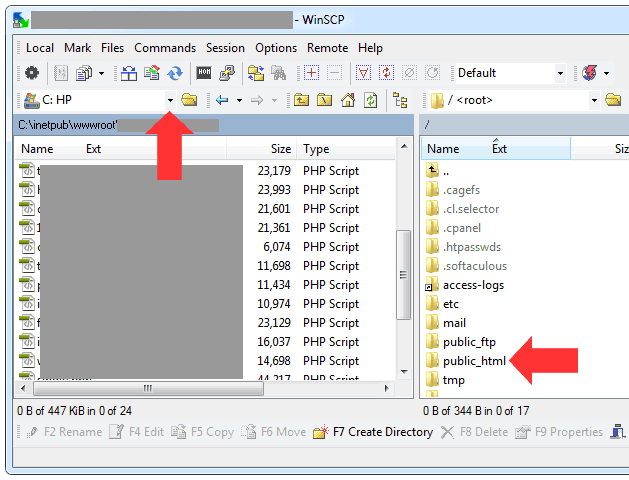
on the left side, choose where the files from the site are as we said at the beginning:
If you use xampp, then your site, ie the files from your site are located in: C:/xampp/htdocs
If you use wamp, then your site, ie the files from your site are located in c:\wamp\www
We have a zipped file if we did it or a list of files. You can transfer just one of those files and unzip afterwards, or you can transfer all the files at once.
On the right side, open the public_html folder (and if it is an Addon Domain, then in the folder of that domain) and on the left side should be your files
select all files and go to upload or click and hold and drag to the right side.
When the upload is finished, the next step goes.
We have finished uploading all the files and now in public_html (and if it is an Addon domain, then in the folder of that domain) we have wp-connetnt wp-admin and so on.
The next thing to do is log in to cPanel (the link, username and password you received in the activation email for hosting).
Creating a database
Let's go to the MySQL Database Wizard in cPanel. The first item is "Step 1: Create A Database" where we enter the name of the database, say siteweb and the first part will be cpanelusername_siteweb. Then we click "Next Step".
Step 2: Create Database User In this step, we create a user for the database. And there we can insert the site code and it will be cpanelusername_site code, and then it is very important and that is the password, which we create using a password generator. We say password generator because if you put admin1234 then you put your site at risk of being infected or hacked, that's why we always recommend a password generator. Once we have added the password, go to "Create User".
Step 3: Add user to database here we click on: ALL PRIVILEGES and then on the "Next Step" button. With this, we have finished that part of the work about creating the base.
90% is finished, now it remains to seed the database and modify the config file.
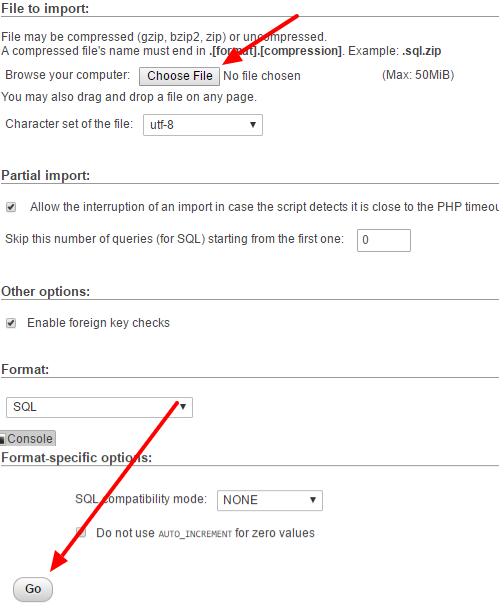
After creating the database, go to the cPanel home page and click on phpmyadmin. When a new window opens, you will notice that it is the same as on your computer. Then we click again on this new base that we created, which is cpanelusername_sajtweb, after we click on it on the right side, we go to "Import" as we went to export, now it is import. The next window appears, and in the first step, we select the file that we created, if you remember, and zipped it, which is test.sql.zip, and the next step is the "Go" button, wait a bit and the upload and installation of the database is complete.
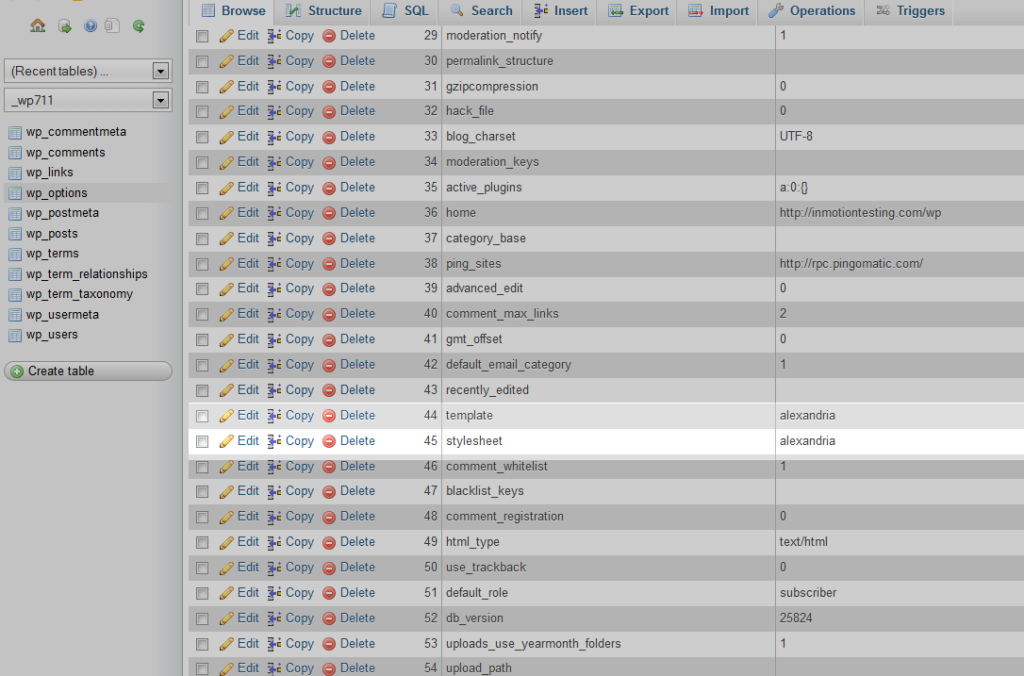
After we have finished this, we go to the left side, click on wp_options and on the right side we see as in the picture:
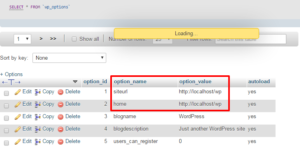
in this part, let's double-click where it says "http://localhost/wp" or something similar for you, but it definitely says localhost, let's replace it with our domain so that it's in the format: "http://www.webhostingsrbija.rs/" and put that for both "siteurl" and "home" after entering and clicking anywhere else, it will be automatically saved.
There is only 1 step left, which is to change the config file.
Connecting the site to the database
We are back on the cPanel home page, go to File Manager, click on public_html (and if it's an Addon Domain, then in the folder of that domain) and there we see all the files we've uploaded (I assume that the upload is finished at this point). Click on wp-config.php and go to "Edit"
When a new window opens with this file in the fields:
/** The name of the database for WordPress */
define('DB_NAME', 'wpbase_prefix');
/** MySQL database username */
define('DB_USER', 'prefix_wpuser');
/** MySQL database password */
define('DB_PASSWORD', 'admin1234');
/** MySQL hostname */
define('DB_HOST', 'localhost');
instead of prefix_wpbase we enter the base we created cpanelusername_sitebase
instead of prefix_wpuser we enter the user we created cpanelusername_sajtkor
instead of admin1234, enter the password that we created using the password generator
when we finish all that, click save in the upper right corner.
When all that is done, we can open the site in the browser and it should work.
If you happen to receive error number 500, you probably did not insert the .htaccess file into public_html (and if it is an Addon Domain, then into the folder of that domain) and insert it, or you did not follow the step when we changed the siteurl and home in the wp_options database. If you have done both of these steps then there should be no problem.
We are certainly here every day from 9 in the morning to 1 in the evening, so you can contact us for any problem.

